


How to add React to a Shopify theme
29 July 2024React is not typically used with Shopify themes due to Shopify's reliance on server-side rendering with Liquid templates. However, recently I encountered a scenario where the enhanced interactivity and dynamic capabilities of React were necessary to achieve a more engaging user experience.
This tutorial will guide you through the process of integrating React into your Shopify themes.
Prerequisites
Before diving into the steps, ensure you have downloaded your store theme onto a folder locally. Your theme files should be in the root directory of your project, like so:
.
├── assets/
├── config/
├── layout/
├── locales/
├── sections/
├── snippets/
└── templates/
Steps
1. Initialize NPM
Open your terminal and initialize a new npm project by running:
$ npm init -y
This command will create a package.json file in your project, which manages your project's dependencies and scripts.
2. Install React
You'll of course need to install the React package to be able to use React in your project. Install React and ReactDOM by running:
$ npm install react react-dom
3. Create the button component
In your project root, create an src folder. This folder will contain your React components.
Within the src folder create a button.js file. This file will contain the button component:
import React from "react";
import ReactDOM from "react-dom/client";

const Button = () => {
  return <button>Button</button>;
};

const button = document.querySelector(".react-button");
if (button) {
  const root = ReactDOM.createRoot(button);
  root.render(<Button />);
}
For the purpose of the build, we want to bundle all of our components into one JS file. Within src create an index.js file. All this file will do is import all our components:
import "./components/button";
Your project structure should now look like this:
.
├── src
│   ├── components
│   │   └── button.js
│   └── index.js
├── assets
├── config
├── layout
├── locales
├── sections
├── snippets
├── templates
└── package.json
4. Install esbuild
We'll need a bundler to build our React code. I'm using esbuild for this project. Install it by running:
$ npm install esbuild -D
After installing esbuild, add this new script to your package.json:
$ esbuild src/index.js --bundle --minify --sourcemap --outfile=assets/index.js
Your package.json should look something like this:
{
  "scripts": {
    "build": "esbuild src/index.js --bundle --minify --sourcemap --outfile=assets/build.index.js"
  },
  "dependencies": {
    "react": "^18.3.1",
    "react-dom": "^18.3.1"
  },
  "devDependencies": {
    "esbuild": "^0.23.0"
  }
}
5. Build the index.js file
Run the build script to bundle your React code:
$ npm run build
This will create a new file called build.index.js under the assets folder.
6. Load the script
Include the bundled React script in your theme.liquid file. Add the following line inside the <head> tag:
<script src="{{ 'react-bundle.js' | asset_url }}" defer></script>
You can now use the React button component in any liquid file within your theme like so:
<div class="react-button"></div>
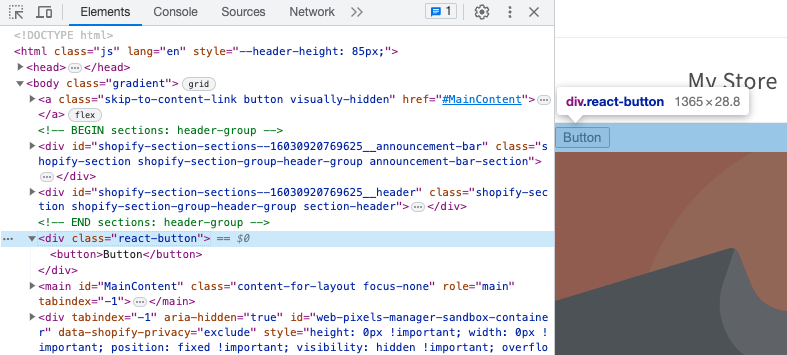
7. Test the button
Now, when you load your Shopify store, you should see the React button rendered inside the .react-button element above.
Additional Tip
If you want to mount the React component to multiple elements, you can use querySelectorAll combined with a forEach loop
This approach would look like this in src/button.js:
const buttons = document.querySelectorAll(".react-button");
buttons.forEach((button) => {
  const root = ReactDOM.createRoot(button);
  root.render(<Button />);
});
Jeff Bocala © 2021. This portfolio site is built with Next.js.
🇦🇺🦘